

Quickstart
This guide covers installing ZeroFS, writing a basic configuration, and mounting an S3-backed filesystem. At the end you have a POSIX filesystem that stores its data in S3.
Before you begin, ensure you have access to an S3-compatible storage service and the necessary credentials (access key ID and secret access key). For quick testing without external storage, you can use a memory:/// URL, which keeps everything in memory (ephemeral: data is lost when the process exits).
Installation
ZeroFS is distributed as a single binary. The Linux amd64 and arm64 builds are statically linked against musl; the other Linux builds link glibc dynamically. On Debian/Ubuntu and Fedora/RHEL, install from the apt or dnf repository: it keeps zerofs up to date through the package manager and also installs a systemd service and a config skeleton. On other platforms, use the install script or build from source.
# amd64 and arm64
curl -fsSL https://pkgs.zerofs.net/zerofs.gpg | sudo gpg --dearmor -o /usr/share/keyrings/zerofs.gpg
echo "deb [signed-by=/usr/share/keyrings/zerofs.gpg] https://pkgs.zerofs.net/deb stable main" | sudo tee /etc/apt/sources.list.d/zerofs.list
sudo apt update && sudo apt install zerofs
Supported platforms
Each release ships prebuilt binaries for ten targets:
| Target | Platform | Linking |
|---|---|---|
x86_64-unknown-linux-musl | Linux amd64 | Static (musl) |
aarch64-unknown-linux-musl | Linux arm64 | Static (musl) |
armv7-unknown-linux-gnueabihf | Linux armv7 | Dynamic (glibc) |
i686-unknown-linux-gnu | Linux i686 | Dynamic (glibc) |
powerpc64le-unknown-linux-gnu | Linux ppc64le | Dynamic (glibc) |
s390x-unknown-linux-gnu | Linux s390x | Dynamic (glibc) |
riscv64gc-unknown-linux-gnu | Linux riscv64 | Dynamic (glibc) |
x86_64-apple-darwin | macOS x86_64 | Dynamic (system libc) |
aarch64-apple-darwin | macOS aarch64 | Dynamic (system libc) |
x86_64-unknown-freebsd | FreeBSD amd64 | Dynamic (system libc) |
The aarch64 binaries are built with jemalloc configured for page sizes up to 64 KiB (JEMALLOC_SYS_WITH_LG_PAGE=16). They run on kernels with 4 KiB, 16 KiB, or 64 KiB pages.
Package repositories (apt/dnf)
The apt and dnf repositories serve zerofs for amd64/arm64 only (the statically linked musl builds); other architectures use the install script or tarball. The repository metadata and packages are GPG-signed. Unlike the install script, a package also installs a systemd service and a config skeleton:
| Path | Purpose |
|---|---|
/usr/bin/zerofs | the binary |
/lib/systemd/system/zerofs.service | systemd unit, runs as the zerofs user |
/etc/zerofs/config.toml | configuration (preserved across upgrades) |
/etc/zerofs/zerofs.env | secrets, mode 0600 (preserved across upgrades) |
The service is not enabled by default: it cannot start until you set the storage URL and credentials. Secrets are read from zerofs.env and referenced as ${VAR} from config.toml:
sudoedit /etc/zerofs/zerofs.env    # set ZEROFS_PASSWORD and S3 credentials
sudoedit /etc/zerofs/config.toml   # set [storage] url, protocols and ports
sudo systemctl enable --now zerofs
The unit is hardened (ProtectSystem=strict, private /tmp, restricted capabilities). Its cache lives in /var/cache/zerofs and its unix sockets in /run/zerofs. If you point [cache] dir at another path, grant write access with sudo systemctl edit zerofs and a ReadWritePaths= line.
Install script options
The install script reads three environment variables. Set them on the right side of the pipe, as in the pinned-release example above.
| Variable | Default | Effect |
|---|---|---|
VERSION | latest | Release tag to install, for example v1.2.5 |
INSTALL_DIR | /usr/local/bin | Destination directory. INSTALL_DIR=$HOME/.local/bin installs without root. The script uses sudo when the destination is not writable. |
SKIP_CHECKSUM | false | true skips SHA-256 verification |
By default the script downloads the multiplatform release tarball and verifies it against the published .sha256 file before extracting.
Verifying downloads
Each release binary and the multiplatform tarball carry GitHub build provenance attestations. Verify a downloaded file with the GitHub CLI:
gh attestation verify zerofs-pgo-multiplatform.tar.gz -R Barre/ZeroFS
The tarball's SHA-256 digest is published alongside it as zerofs-pgo-multiplatform.tar.gz.sha256.
Building with the Web UI
cargo build --release produces a binary without the Web UI; the webui cargo feature is off by default. A binary built without the feature accepts a [servers.webui] section in its configuration but starts no web server and logs no warning.
To build with the Web UI, run make from the repository root:
make build-release
The target builds the shared Rust client for the browser with wasm-pack, then builds the frontend (npm ci, buf generate, the v86 VM image script, npm run build), and finally runs cargo build --profile release --features webui. Running cargo build --features webui on its own fails: the binary embeds webui/dist at compile time, and the directory exists only after the frontend build.
Install the WebAssembly target and wasm-pack before building:
rustup target add wasm32-unknown-unknown
cargo install wasm-pack --version 0.15.0 --locked
The frontend also needs Node.js (CI uses Node 22), bsdtar (the libarchive-tools package on Debian/Ubuntu), and squashfs-tools. The VM image script downloads an Alpine 3.21 ISO and v86 BIOS files and verifies their SHA-256 checksums.
Prebuilt release binaries and the Docker image are built with the webui feature and include the Web UI.
Docker image
ghcr.io/barre/zerofs is published for linux/amd64, linux/arm64, linux/arm/v7, and linux/386, with a provenance attestation and SBOM. Tags: latest (newest release), X.Y.Z, X.Y, and sha-<commit>.
The entrypoint is the zerofs binary, so arguments after the image name are zerofs subcommands. The container runs as user zerofs (UID 1001), not root; a bind-mounted cache directory must be writable by UID 1001. The image exposes ports 2049 (NFS), 5564 (9P), and 10809 (NBD). Actual listeners come from the [servers.*] sections in the configuration, and each protocol in use needs its own -p mapping.
Configuration
Create a configuration file for ZeroFS:
# Write a config template to ./zerofs.toml
# (overwrites an existing file)
zerofs init

# Or write the template to stdout
zerofs init - > /path/to/zerofs.toml
Edit the configuration file with your settings:
[cache]
dir = "/var/cache/zerofs"
disk_size_gb = 10.0
memory_size_gb = 2.0    # Optional memory cache

[storage]
url = "s3://my-bucket/zerofs-data"
encryption_password = "your-secure-password"

[aws]
access_key_id = "your-access-key"
secret_access_key = "your-secret-key"
region = "us-east-1"

[servers.ninep]
addresses = ["127.0.0.1:5564"]

[servers.nfs]
addresses = ["127.0.0.1:2049"]
Start ZeroFS
Now start ZeroFS with your configuration:
# Start ZeroFS with configuration file
zerofs run --config zerofs.toml

# Or use the shorthand
zerofs run -c zerofs.toml
Mount the Filesystem
With ZeroFS running, mount the filesystem. On Linux, the recommended client is ZeroFS's own zerofs mount. It connects to the 9P server, mounts as a regular user without root, and reconnects on its own if the server restarts or is temporarily unavailable. NFS and the Linux kernel 9P client also work:
# Linux: ZeroFS's own client. Requires [servers.ninep] in your config.

# Create mount point
sudo mkdir -p /mnt/zerofs

# Connect to the 9P server and mount via FUSE (runs as a regular user)
zerofs mount 127.0.0.1:5564 /mnt/zerofs

# Or over a Unix socket for lower-latency local mounts:
# zerofs mount /tmp/zerofs.9p.sock /mnt/zerofs
Using NBD Block Devices
With NBD enabled, block devices are created as files under the .nbd directory. New devices are picked up at runtime without a server restart:
# First, ensure NBD is configured in your TOML:
# [servers.nbd]
# addresses = ["127.0.0.1:10809"]

# Mount the filesystem (if not already mounted)
sudo mount -t nfs -o vers=3,async,nolock 127.0.0.1:/ /mnt/zerofs

# Create a block device file
sudo mkdir -p /mnt/zerofs/.nbd
sudo truncate -s 10G /mnt/zerofs/.nbd/my-device

# Install nbd-client if needed
sudo apt-get install nbd-client  # Debian/Ubuntu
sudo yum install nbd              # RHEL/CentOS

# Connect to the NBD device
sudo nbd-client 127.0.0.1 10809 /dev/nbd0 -N my-device

# Create filesystem
sudo mkfs.ext4 /dev/nbd0

# Mount the block device
sudo mkdir -p /mnt/nbd0
sudo mount /dev/nbd0 /mnt/nbd0
Verify It's Working
Test your new filesystem:
# Check mount
df -h /mnt/zerofs

# Create a test file
echo "Hello from ZeroFS!" > /mnt/zerofs/test.txt

# Read it back
cat /mnt/zerofs/test.txt

# Check file metadata
ls -la /mnt/zerofs/
Watch the Filesystem
With the server running, zerofs monitor opens a live dashboard in the terminal: read and write throughput and IOPS, operation counters, garbage collection, the segment store's footprint (durable on the store versus still buffered in RAM), and process memory.
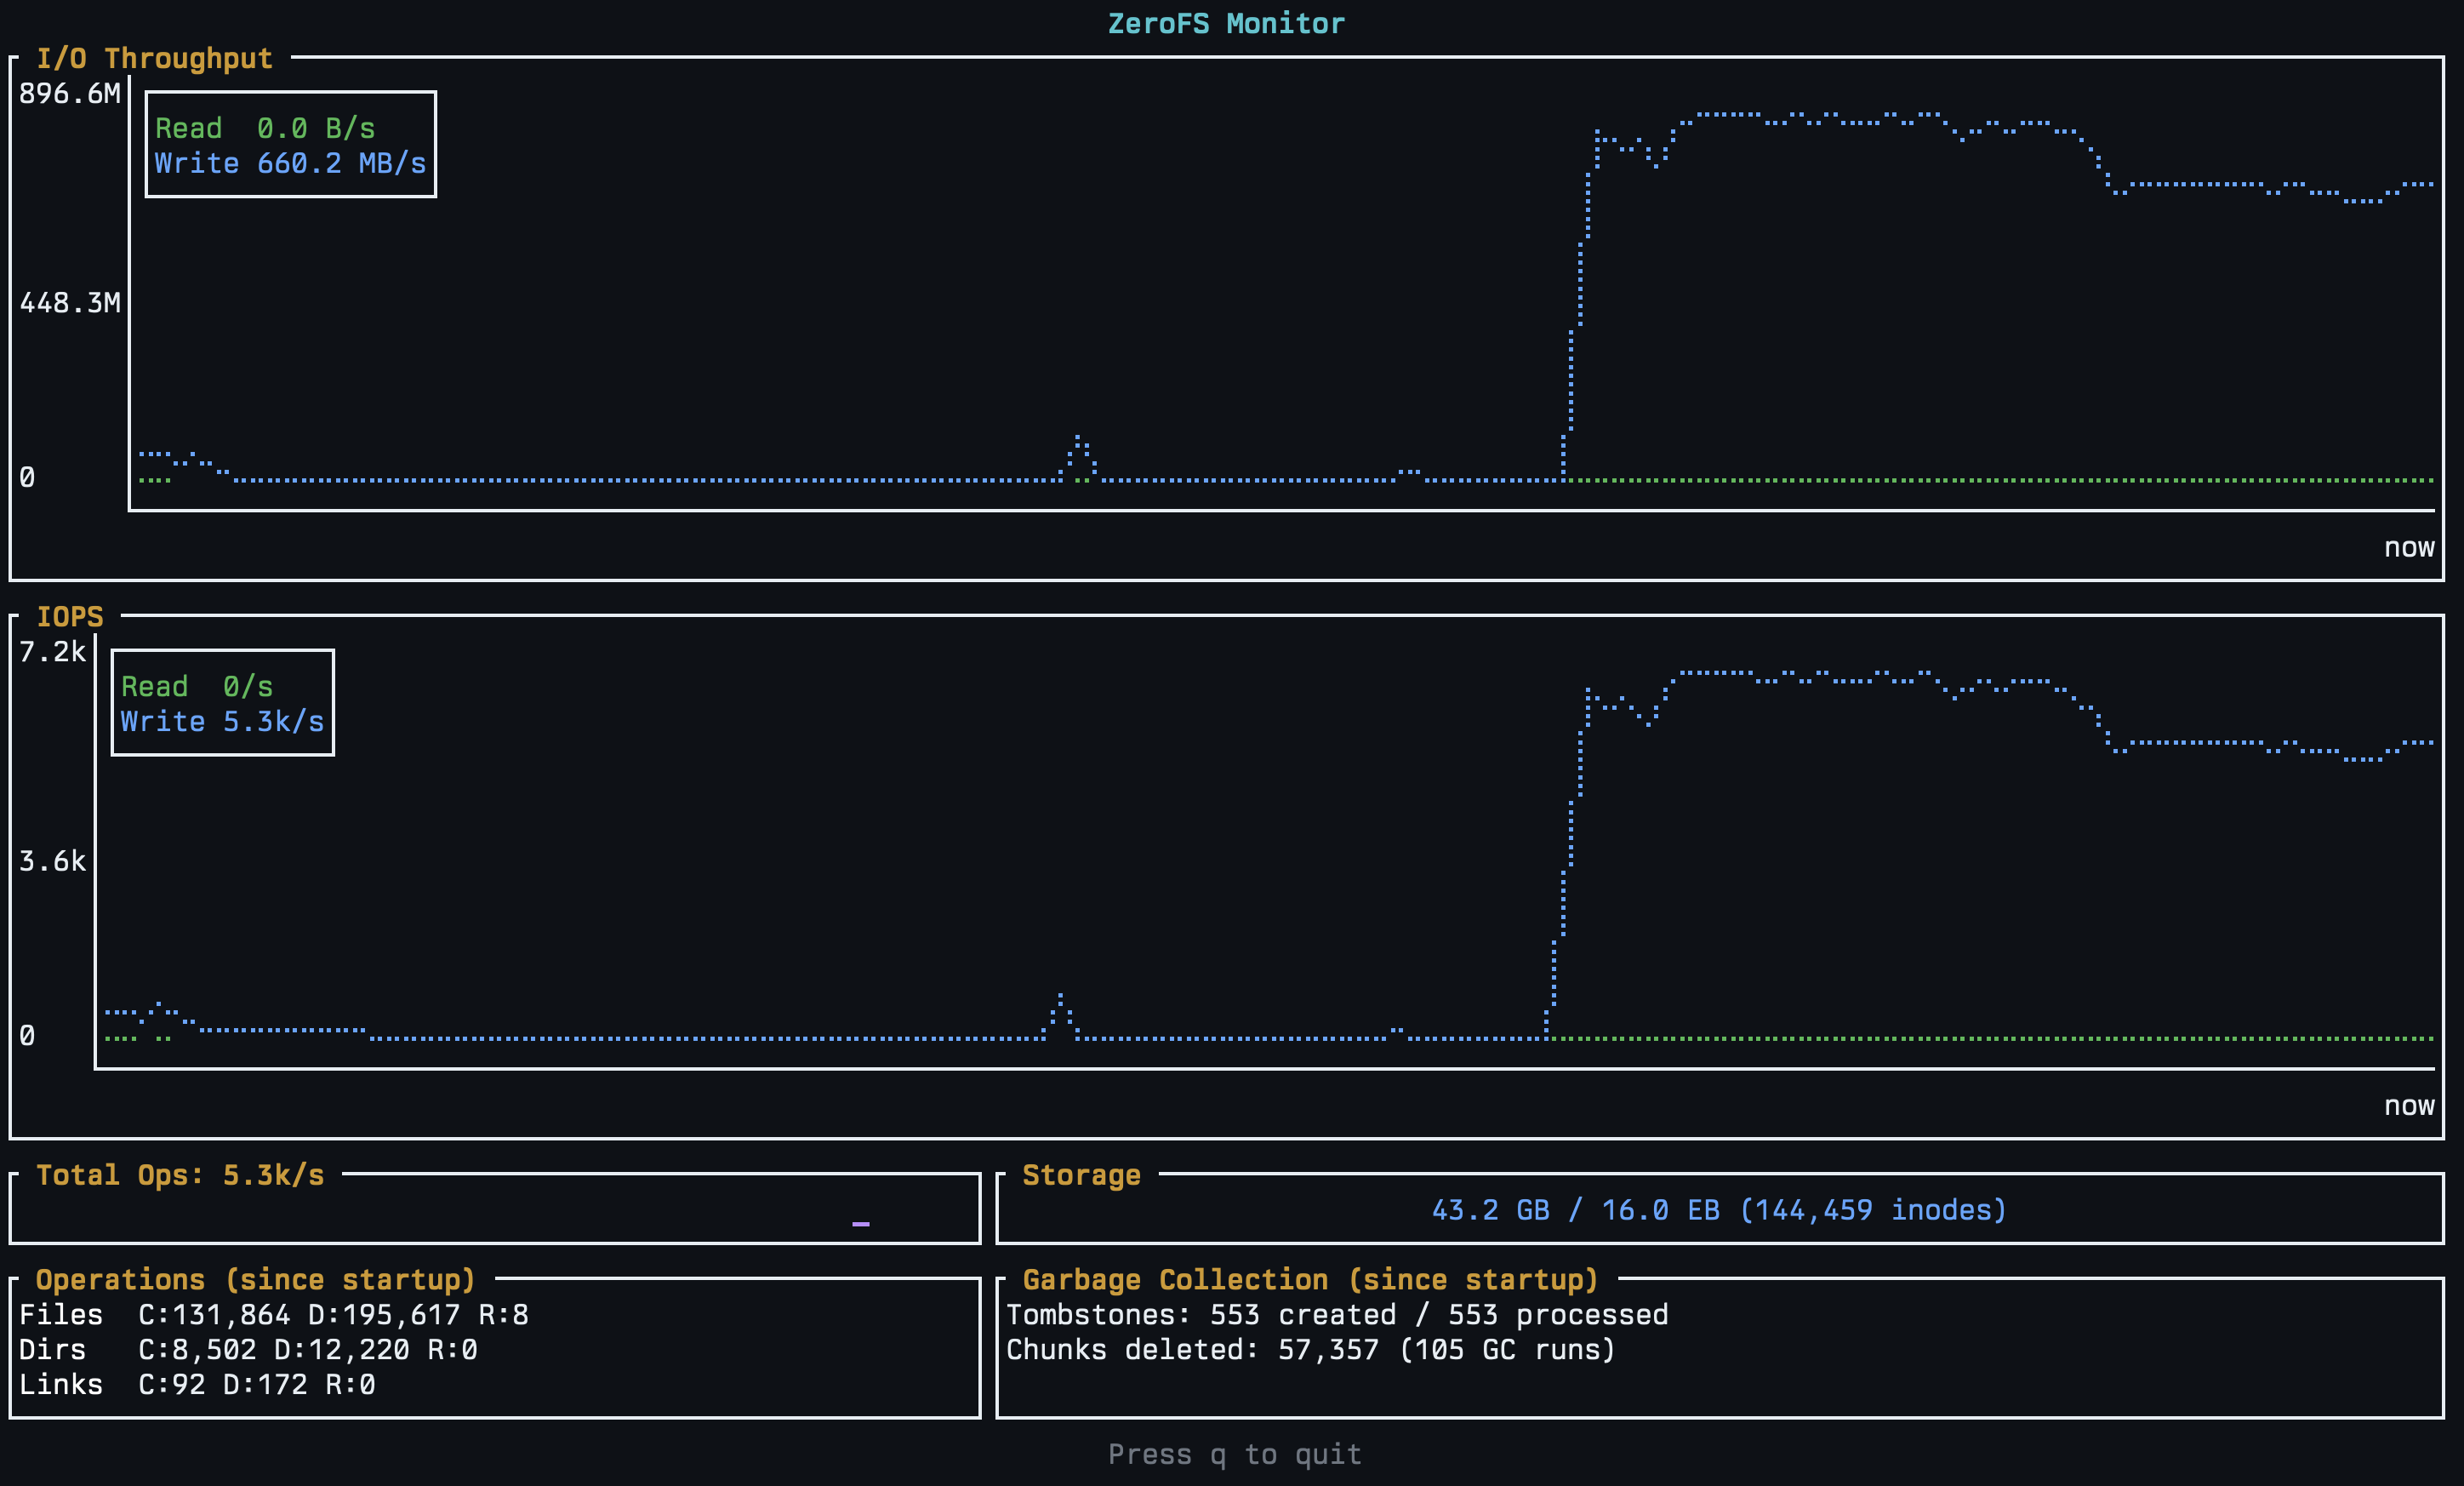
The dashboard reads from the admin RPC server. The zerofs init template enables it; if you wrote the configuration by hand, add a [servers.rpc] section:
[servers.rpc]
addresses = ["127.0.0.1:7000"]
# Refreshes every 250 ms by default; press q to quit
zerofs monitor -c zerofs.toml
For per-operation tracing, zerofs fatrace prints one line per filesystem operation and zerofs otrace one line per object-store request.
Next Steps
The filesystem is mounted and storing its data in S3. From here:
- Configure NBD block devices for raw block storage
- Learn about encryption and how data is encrypted before upload
- Configure caching to size the memory and disk caches
- Explore advanced architectures like geo-distributed storage